The Ultimate Guide to Hiking the Green Sand Beach Big Island: A Personal Journey
First and foremost, planning my Hawaiian trip was incredibly exciting. My bucket list was already overflowing with majestic waterfalls and thrilling volcano hikes long before I even booked my flights. However, one specific spot kept catching my eye during my late-night research. Specifically, the green sand beach Big Island kept showing up repeatedly in my travel searches. Consequently, this unique coastal destination sounded like an absolute fantasy location.
Dreaming of Green Sand
In the past, I have seen white, black, and even pink sand on my various global travels. Green sand, on the other hand, was completely new to me. Therefore, I knew I had to see it with my own two eyes. Ultimately, feeling those rare emerald crystals between my toes became a primary goal for my Hawaiian trip. Experiencing the wild, untamed beauty of Hawaii’s southern coast felt like a true adventure just waiting to happen.
The Real Challenge of the Hike
Unfortunately, my initial understanding of the trip changed dramatically the moment I arrived at the trailhead. The actual journey to this beach is rugged, intensely hot, and incredibly tiring. If you search for the green sand beach Big Island on your phone, you absolutely need to know this is not an easy roadside stop. For example, you cannot simply park your rental car and lay down a beach towel. Instead, you face a strenuous 5.6-mile round-trip hike. Furthermore, the harsh Hawaiian sun beats down hard on you during the entire walk.
Why You Should Read My Guide
Despite the intense heat, the difficult trek is completely worth the physical effort. Reaching the sparkling bay feels like a massive personal accomplishment. Throughout this comprehensive guide, I will share exactly how I managed the hike successfully. Moreover, we will talk about the fascinating science behind the sand, exactly what you need to pack, and why you should actively avoid the illegal local shuttles. If you love discovering authentic, hard-to-reach travel spots like this, be sure to check out more of my personal itineraries on my main page at travellingtoo.com.
The Science: Why is the Sand Green at Papakōlea?
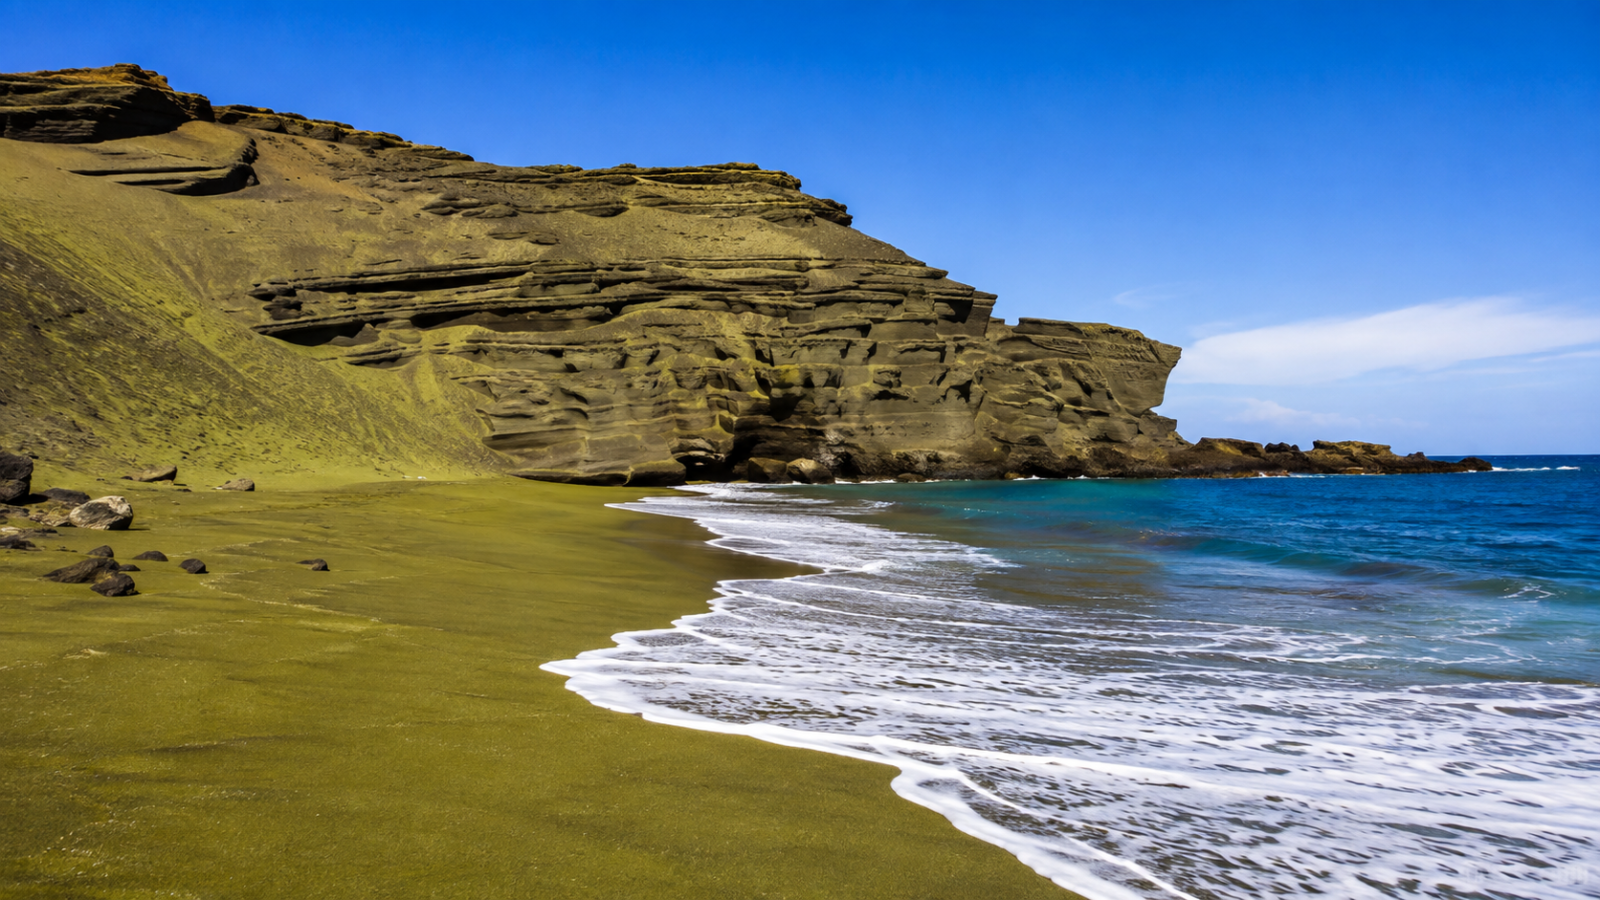
Before we actually start walking, we must talk about the sand itself. Looking down into the bay for the first time, the sand was definitely not a fake, neon green. It actually showed a rich, olive-drab color. Furthermore, the beach sparkled like crushed gold under the bright afternoon sun. This natural wonder is exceptionally rare. In fact, Papakōlea is one of only four green sand beaches in the entire world.
The Magic of Olivine Crystals
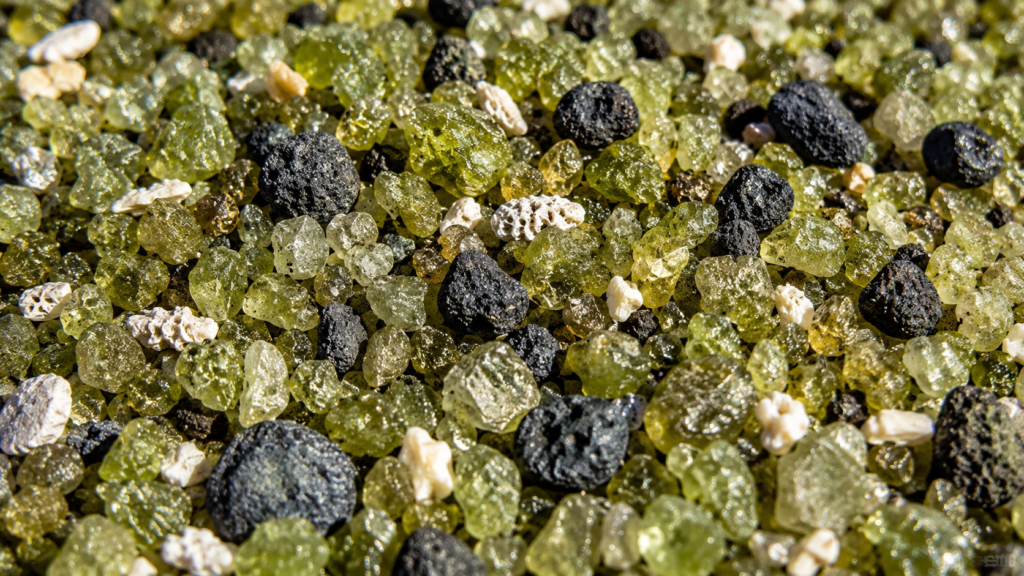
Specifically, a special mineral called olivine creates this stunning green color. Olivine naturally forms inside basaltic lava. Fortunately for us, Hawaiian volcanoes produce this specific type of lava constantly. The beach itself sits tucked inside a large, steep bay. Interestingly, this bay was carved right into the side of a massive cinder cone called Puʻu Mahana.
How the Beach Formed Over Time
A prehistoric eruption from the Mauna Loa volcano formed this cinder cone thousands of years ago. Ocean waves have violently battered the sides of Puʻu Mahana ever since that ancient eruption. Consequently, salt water slowly erodes the volcanic rock over long periods of time. Lighter volcanic ash quickly washes away into the deep sea. Olivine crystals, on the other hand, are much heavier and denser.
Discovering the “Hawaiian Diamond”
Because olivine is heavy, it stubbornly stays trapped on the shore. These green crystals build up over centuries to create the green sand beach Big Island is so famous for today. Picking up a handful of sand reveals amazing tiny details. For instance, you will clearly see black lava rock, white sea shells, and bright green crystals mixed together. Locals often call olivine the “Hawaiian Diamond.” Seeing the sand shine against the blue water makes that nickname make perfect sense.
How to Get to the Green Sand Beach Big Island
Reaching Papakōlea is a major adventure that strictly requires a reliable rental car. The beach rests near Ka Lae, which is also widely known as South Point. Geographically, this rocky spot is the southernmost point in all 50 United States. The whole area feels very remote, intensely windy, and completely wild. Therefore, you will absolutely not find modern tourist setups or luxury resorts anywhere near here.
Driving from Kona
Driving takes a bit of time from either major coastal city. Starting from Kona, the trip takes about two full hours heading south on Highway 11. You will pass several charming, quiet small towns along the way. Stopping in Captain Cook for a quick coffee breaks up the drive nicely. Additionally, the ocean views from the highway are spectacular.
Driving from Hilo
Coming from Hilo also takes roughly two hours. The scenic drive from Hilo goes straight past the entrance to Hawaii Volcanoes National Park. Seeing the dramatic volcanic landscape on your way down sets the adventurous mood perfectly. The weather often changes drastically from rainy in Hilo to bone-dry near South Point. Consequently, you should be prepared for sudden climate shifts.
Navigating South Point Road
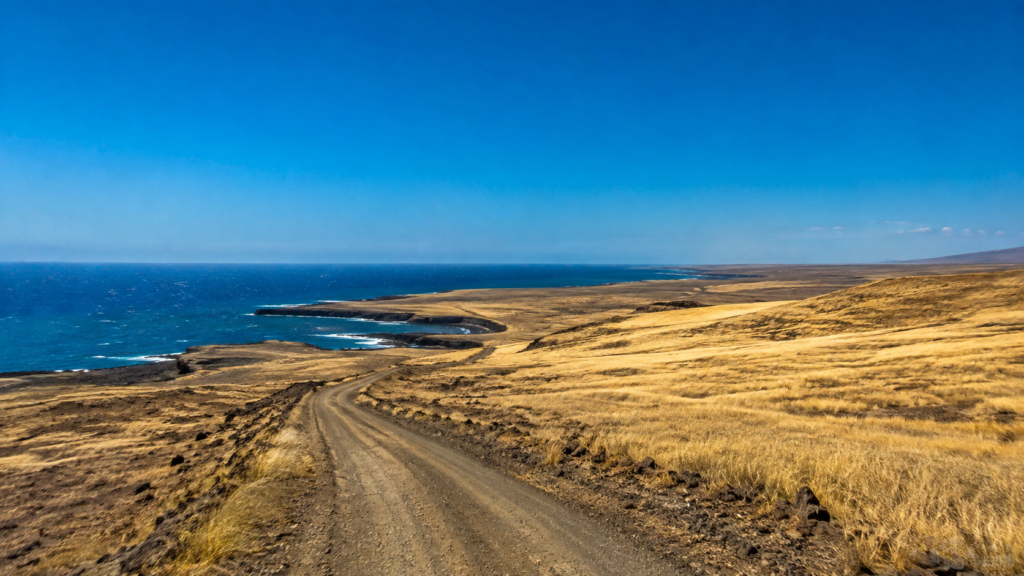
Your main turn is onto a narrow street called South Point Road. This crucial turn sits right between mile markers 69 and 70 on Highway 11. Turning here feels like entering a completely new, isolated world. Lush green jungle plants quickly change into dry, golden cattle pastures. The road stretches on for about eight miles. Because it gets dangerously narrow in some spots, drivers must yield carefully to local farm traffic.
Finding the Dirt Parking Lot
Near the end of your long drive, the road forks into two distinct paths. Going right takes you directly to the famous South Point cliffs. To reach the green sand beach Big Island, you must firmly stay left. A small dirt parking lot sits near a concrete boat launch at Kaulana Bay. Parking is currently free but very unorganized. Thus, arriving early in the morning helps you secure a safe spot easily.
The Great Debate: Hiking vs. Local “Shuttles”
Getting out of my car, several locals approached me right away. They enthusiastically offered rides to the beach for twenty dollars in their lifted pickup trucks. Reading anything about the green sand beach Big Island means you will undoubtedly hear about these shuttles. I want to be very clear about my strict stance on this based on my personal trip.
Why the Shuttles are Illegal
Paying for a quick ride sounds fantastic when the sun is blazing hot. Taking these shuttles is actually a terrible idea, though. The Department of Hawaiian Home Lands (DHHL) officially owns all of this coastal land. They have strictly banned all motorized vehicles to protect the fragile dirt and rare plants. Consequently, locals offering rides are actively breaking state rules.
Environmental and Cultural Damage
Trucks drive off-road everywhere because there is no official paved street. Deep dirt ruts now cover the beautiful, natural landscape. I saw the massive damage these trucks cause firsthand while I was hiking. The coastal ecosystem is incredibly weak and easily destroyed by heavy, spinning tires. Native Hawaiian people also value this land deeply. Sacred ancient temple sites sit all along the coast here. Driving noisy trucks over them is highly disrespectful.
Rental Car Risks and Violations
Never try to drive your own rental car out there. Car rental companies completely ban driving on this specific dirt path. Getting stuck in the deep, soft sand happens to optimistic tourists daily. Furthermore, hitting a sharp lava rock can easily break your car’s axle. You will pay thousands of dollars to get a specialized tow truck out there.
A Rough and Bumpy Ride
Riding in the back of a local truck is rough, even if you ignore the environmental rules. Dust flies everywhere, choking the paying passengers in the back. The constant bouncing hurts your knees and back severely. Therefore, let’s choose to protect the sacred land and walk instead.
Detailed Driving and Distance Breakdown
Planning your morning perfectly ensures you beat the terrible midday heat. I created a helpful reference table to show you exact travel times. This will help you plan your departure depending on where your hotel is located.
Travel Times to the Trailhead
| Starting City | Highway Route | Estimated Drive Time | Distance to Trailhead |
| Kailua-Kona | Highway 11 South | 1 hour 45 minutes | ~65 Miles |
| Hilo | Highway 11 South | 1 hour 50 minutes | ~75 Miles |
| Volcano Village | Highway 11 South | 1 hour 15 minutes | ~45 Miles |
| Waikoloa Village | Hwy 19 to Hwy 11 | 2 hours 15 minutes | ~85 Miles |
As a result of these long distances, you absolutely must factor drive time into your hiking schedule. Waking up at 5:00 AM might sound painful on vacation. However, getting to the trailhead before 8:00 AM changes the entire hiking experience for the better.
Step-by-Step: My Personal Hiking Experience
I firmly strapped on my backpack and finally started walking. The hike is roughly 2.8 miles each way. Walking 5.6 miles total sounds manageable because the ground is mostly flat. In fact, only 275 feet of elevation gain happens on the entire trail. The real difficulty comes directly from the hot sun and blowing dirt.
Following the Coastal Paths
Strong ocean winds blow constantly across this exposed southern point. Navigating the maze of rutted trails takes a little patience. Here is exactly what to expect on your walk out to the bay.
1.Mile One: The Windy Start:Starting from the boat launch.
First, turn left at the concrete boat launch and keep the deep blue ocean on your right shoulder. No single official trail exists out here. Consequently, you face a messy web of dirt paths made by illegal trucks. I picked the walking paths closest to the water. The violent wind tossed refreshing salt spray into the air.
2.Mile Two: The Barren Lava Fields:Dealing with the hot sun.
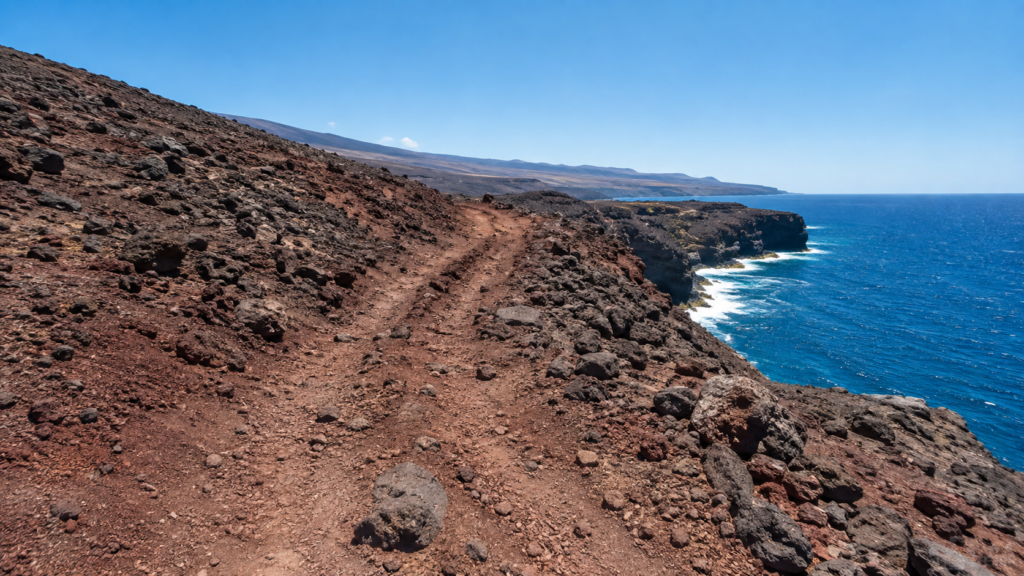
Second, isolation hits hard around mile one and a half. Ancient black lava rocks cover the ground everywhere. Looking inland shows the massive Mauna Loa volcano hiding in the clouds. Meanwhile, the midday sun feels very heavy here. Drinking plenty of ice water kept my energy up.
3.Mile Two and a Half: The Big Reveal:Nearing the destination.
Next, crossing the two-mile mark brings a large, strangely shaped hill into view. This large hill is the remains of Puʻu Mahana. Interestingly, you cannot see the green sand until the very end of the hike. Walking up a small dirt incline brings you to the edge. The ground changes from red dirt to a grey ash color here.
4.The Crater Edge:Looking down at the beach.
Eventually, the ground drops away suddenly on your right side. Standing on the high rim takes your breath away. Bright green sand meets frothy white waves below. Furthermore, the deep sapphire blue ocean makes the colors pop beautifully. It honestly looks like an alien planet.
5.The Final Descent:Getting to the sand safely.
Finally, going down the cliff is the last physical step. Walk around to the northern edge of the beautiful bay. A steep walking path leads directly down the rock face. A metal staircase helps hikers with the hardest drop. Taking my time carefully kept me from slipping.
Arriving at Mahana Bay: First Impressions
Standing on the green sand beach Big Island feels completely surreal. The high walls of the cinder cone block most of the harsh wind. As a result, a natural, quiet bowl shape completely surrounds you. I dropped my heavy bag just to touch the water immediately.
Swimming Conditions at the Beach
Jumping right into the ocean is incredibly tempting after a hot hike. Please be very careful before you swim, however. The surf at Papakōlea is notoriously strong and highly unpredictable. Open ocean swells hit this beach directly from the south. No coral reef protects the bay from these large waves. Consequently, surges crash hard onto the steep sandy shore.
Ocean Safety Tips for Visitors
Lifeguards do not work at this remote beach. Emergency medical help is literally hours away. Furthermore, cell phone service practically does not exist down in the crater. The water was thankfully calm on my specific visit. I waded in to cool my tired legs off safely. Clear water felt amazing on my hot, sunburned skin. Never turn your back on the waves, though. Big sets of waves can show up fast without any warning. Skip swimming entirely if the water looks rough or angry.
The Legend of Pele’s Curse
Eating a quick snack on my towel, I remembered an important rule. Do not take the sand home with you. Hawaii state law heavily protects all sand and natural rocks. Taking sand from the green sand beach Big Island disrespects Hawaiian culture deeply. Local island stories frequently warn tourists about Pele’s Curse. Specifically, Pele is the powerful Hawaiian goddess of fire and volcanoes. Legends say terrible bad luck follows anyone who steals sand. Therefore, leave the beautiful beach exactly as you found it today.
Photography Tips for Capturing the Green Sand
Taking pictures of the green sand beach Big Island can actually be surprisingly tricky. The bright Hawaiian sun creates intense glare on the ocean water. Moreover, the camera sometimes struggles to capture the true olive-green color of the sand. Therefore, I want to share a few photography tricks I learned during my visit.
Dealing with Harsh Sunlight
First, try to photograph the beach early in the morning. The midday sun washes out the deep green colors terribly. The softer morning light makes the olivine crystals sparkle nicely. If you arrive at noon, use your own shadow to block the direct sun when taking close-up sand photos.
Using a Circular Polarizer
Second, I highly recommend using a circular polarizer on your camera lens. This special glass filter removes the shiny glare from the ocean surface. Consequently, the water looks much deeper and bluer in your pictures. Furthermore, the polarizer helps pull the rich colors out of the volcanic rocks. Cell phone users can also buy cheap, clip-on polarized lenses online.
Best Angles for Photos
Finally, make sure you take photos from the top of the cliff before you climb down. The overhead view shows the amazing contrast between the green sand and the blue water perfectly. Once you are down on the beach, get incredibly close to the ground. Macro shots of the tiny crystals look absolutely incredible on social media.
Essential Packing List for the Hike
Hiking into a remote desert area requires excellent, thoughtful planning. No bathrooms or water fountains exist out here at all. Finding a shady tree is completely impossible on this trail. Therefore, packing well makes the long trip much better. My personal journey taught me exactly what you need to bring.
Gear Comparison Table
Here is what you absolutely need to pack and what you should definitely leave behind at your hotel.
| Item Category | What to Bring (My Top Picks) | What to LEAVE Behind | Why? |
| Footwear | Good hiking boots or thick trail running shoes. | Flip-flops (slippers), sandals, or bare feet. | Sharp lava rock and uneven dirt paths will destroy your feet without good shoes. |
| Hydration | A hydration bladder with at least 3 liters of water. | One single small plastic water bottle. | Sweating happens incredibly fast. The ocean wind hides how hot you really are. |
| Sun Protection | Reef-safe sunscreen and a wide hat with a chin strap. | Loose baseball caps and aerosol sprays. | Strong coastal winds will blow loose hats right away into the ocean. |
| Gear | A light microfiber towel and a dry bag for phones. | Heavy beach chairs or big umbrellas. | Carrying bulky things for six miles is terrible. Keep your backpack light. |
What Was Specifically in My Backpack
Showing my exact packing list might help you plan your day better. Here are the specific items I carried with me.
- Ice Water: Adding solid ice to my water bladder completely saved me. Cold water tastes amazing at mile four.
- Reef-Safe Sunscreen: Hawaii completely bans bad sunscreens to protect living coral. I used a thick, protective zinc lotion.
- Electrolytes: Sweating out salt is dangerous for your muscles. Powder drink packets fix this issue quickly.
- Camera Bag: Wind blows fine abrasive dust everywhere. A sealed dry-bag strictly keeps expensive cameras safe.
- Sun Shirt: Wearing a long-sleeve UPF shirt actively stops bad sunburns. Sticky sunscreen gets annoying after a few hours of dust.
- Trash Bags: Garbage cans do not exist anywhere near here. Take all your trash back to your rental car.
The Wildlife You Might Encounter
While the landscape looks completely barren, life still finds a way to survive here. The southern coast of the Big Island hosts a few tough species. Keeping your eyes open makes the long hike much more interesting.
Wild Goats and Mongooses
First, you will likely see herds of wild goats roaming the dried lava fields. They perfectly balance on the sharp rocks looking for small patches of green grass. Additionally, you might spot a small, furry animal darting across the trail. These are mongooses, which were brought to Hawaii years ago to hunt rats. Unfortunately, they also eat native bird eggs.
Marine Life in the Bay
Second, the ocean holds amazing sights if you look closely. During the winter months, humpback whales swim right past South Point. I constantly scanned the horizon looking for water spouts. Furthermore, Hawaiian green sea turtles sometimes swim in the shallow waters near the boat launch. Always remember to give these protected turtles plenty of space.
Important Safety Rules and Trail Etiquette
Visiting the green sand beach Big Island carries a very big personal responsibility. The nature here is remarkably easy to damage permanently. More tourists inevitably mean more stress on the fragile land. Please follow strict Leave No Trace rules during your visit.
Why You Must Stay on the Trail
Stick only to the main, established dirt walking paths. Walking into the dry brush hurts the native plants severely. Plant roots essentially hold the loose dirt in place and stop erosion. Furthermore, wandering off the trail can also disturb ancient Hawaiian burial sites. Showing respect is incredibly easy when you simply stay on the path.
Wildlife and Cliff Safety Guidelines
Here are a few quick safety rules you need to memorize.
- Never feed wild animals any of your human food.
- Do not stand near the cliff edges to take photos.
- Always check the weather before leaving your hotel.
- Tell someone where you are going before you lose cell service.
Sudden wind gusts happen very often at South Point. The brittle rock can easily break and fall directly into the sea. Therefore, take your photos from a safe, solid distance.
Bathroom Etiquette in the Wild
Using the bathroom outside is sometimes required on long hikes. Pack out your used toilet paper if you absolutely must go. Leaving white paper blowing in the lava fields looks awful. Consequently, bring a small plastic bag just for this specific purpose. Clean trails make everyone happy and protect the earth.
Hiking with a Partner
Heat exhaustion poses a very real, dangerous threat out here. Check your hiking buddy often for pale skin or dizziness. Stop walking immediately if someone feels sick or confused. Sit down on the ground and drink water right away. Taking frequent breaks easily keeps you and your group safe.
Post-Hike Recovery: What to Do Afterward
Finishing the hike leaves you feeling accomplished but extremely tired. You will likely be hungry, thirsty, and covered in red dust. Luckily, the nearby Kaʻu district offers a few great spots to recover. Therefore, I highly recommend making a few stops on your drive back.
Punaluʻu Bake Shop
Driving back up Highway 11, you will pass through the tiny town of Naalehu. This town is home to the famous Punaluʻu Bake Shop. Billed as the southernmost bakery in the USA, it is the perfect post-hike stop. I bought two massive, sweet Hawaiian sweetbread rolls. Consequently, the sugar rush completely brought me back to life.
Punaluʻu Black Sand Beach
Interestingly, another famous colored beach sits just a few miles up the road. Punaluʻu Black Sand Beach is easily accessible by car without any hiking. Therefore, it makes a great relaxing stop after your grueling morning walk. The black sand feels amazing, and sea turtles constantly rest on the shore here. Ultimately, seeing a green beach and a black beach on the same day is an amazing experience.
The Hike Back: A True Test of Willpower
Spending a full hour at the beach was absolutely amazing. I swam, took lots of photos, and relaxed happily in the sand. Eventually, I knew I had to walk all the way back. Climbing the steep metal stairs to the top was incredibly tough. Moreover, the sun felt much hotter by mid-morning.
Facing the Brutal Afternoon Heat
The walk back to the car honestly felt much longer. Ferocious wind blew straight into my face this time around. Looking down at my boots and walking steady helped me finish. Seeing the crowded, dusty parking lot on the horizon made me smile. Reaching my rental car felt like a massive, hard-earned victory.
Cooling Down at the Car
Turning on the car air conditioning felt like pure, absolute magic. Drinking a cold sports drink helped me recover my energy fast. Red dirt completely covered my legs and hiking boots. Furthermore, sweat soaked through my shirt completely. I was very tired but completely thrilled with the adventure.
Comparing Papakōlea to Other Hawaiian Beaches
Hawaii obviously has thousands of amazing beaches. You might wonder how this specific hike compares to other popular spots. I have visited many beaches across the islands. Therefore, I can honestly say this one is completely unique.
The Kohala Coast vs. South Point
For example, the beaches on the Kohala coast are famous for soft white sand and luxury resorts. Hapuna Beach is perfect for families wanting easy swimming and cold drinks. Conversely, the green sand beach Big Island offers zero luxury. You must earn your view through sweat and hard work here.
Waipiʻo Valley vs. Papakōlea
Similarly, Waipiʻo Valley also requires a very steep, difficult hike to reach a black sand beach. Both locations feel incredibly wild and completely cut off from the modern world. However, Waipiʻo is lush, rainy, and full of dense green jungle. Papakōlea, meanwhile, is a dry, barren desert landscape. Both are amazing, but they offer totally opposite climates.
Frequently Asked Questions
Readers constantly ask me many questions about this specific spot. Planning a trip to the green sand beach Big Island requires knowing the exact details. Here are honest answers straight from my real experience.
Is the hike really worth it?
Yes, the difficult hike is incredibly rewarding. Seeing this rare green sand in person is amazing. The color contrast against the blue water is beautiful. Skip this spot entirely if you hate walking in the heat, though.
Are there bathrooms nearby?
No bathrooms exist anywhere on the hiking trail. A single portable toilet sits near the parking lot sometimes. Do not rely on it being clean or even having toilet paper. Use a real restroom in Naalehu town before driving down the road.
When is the absolute best time to go?
Early morning is the absolute best time to visit. Try to start walking by 7:30 AM if possible. Midday heat out on the lava rocks is very dangerous. Early hikers also get to enjoy a quiet beach before large crowds arrive.
Can I bring my dog or young kids?
Leaving dogs at home is clearly the best choice. Hot rocks will quickly burn their sensitive paws. Furthermore, young children might really struggle with the long, hot walk. Older kids can do it with proper shoes and lots of extra water.
What happens if I get stuck in the sand?
If you foolishly try to drive and get stuck, you have a major problem. Tow companies charge exorbitant fees to travel down South Point Road. Additionally, cell service is spotty, so calling for help is difficult. Therefore, park your car at the boat ramp and just walk.
Conclusion & Final Thoughts
Visiting the green sand beach Big Island easily ranked as a top highlight of my entire trip. The walk was definitely not easy or relaxing. However, the wild, untamed beauty of Papakōlea made every sweaty step special. This magical place demands high respect from everyone who visits.
Protecting the Future of the Beach
Respecting the dangerous ocean and the hot sun keeps you safe. Respecting the land protects important Hawaiian history constantly. Walking instead of paying for illegal trucks helps nature a lot. Packing out all your trash keeps the beach beautiful for tomorrow. We can easily keep this green shoreline vibrant for many years if we work together.
Read More Travel Guides
Planning your Big Island itinerary is a lot of fun. Find more hidden spots and travel tips on my blog regularly. Check out all my detailed packing lists on my main page at travellingtoo.com. What do you think of this unique beach?

3 thoughts on “The Ultimate Guide to Hiking the Green Sand Beach Big Island: A Personal Journey”